
Yeast blini have been traditionally prepared in Russia at Pancake Week (Maslenitsa). Before Christianity onset it was a week of pagan celebrations when people parted with harsh Winter and welcomed long-awaited Spring.
Nowadays it is a week of festivities at the end of winter, before Great Lent that lasts until Orthodox Easter. People gather in still snowy parks to sing, dance, watch improvised shows, take part in funny competitions, and eat in the open air. Food is abundant and copious: pelmeni, pirozhki, blini to name a few. Blini is the main dish since a blin (singular form of blini) symbolizes Sun.
I cook different types of blini, but yeast blini I make once a year at the end of Pancake Week, and it is our family tradition here in America. These blini are thick, and rich, and fun to eat.
The process is rather challenging, but once you get a grip on it, it’s pretty easy to do. Today’s recipe was introduced to me by aunt Shura and is published in her memory.
3 large eggs
3 1/4 cups milk
3 tsp sugar
1/2 tsp salt
2.5 cups all-purpose flour, sifted
2-2.5 tsp dry yeast
Oil to grease the skillet
1 stick (about 100g) butter to oil ready blini
Preparation time: 3-5 hours, depending on the quality of yeast
Yields 18-20 blini
1/2 small raw unpeeled potato and a fork, for greasing tool
3 quart covered pot (better enameled or at least stainless steel)
Non-stick skillet, 8-9″ diameter
Ladle or a big spoon
Wooden/bamboo spatula
Heat-proof dish to stack ready blini
Garnishes:
Salted herring, thinly sliced and garnished with onions
Caviar
Melted butter
Soft boiled eggs, chopped
Sour cream
Method:
1. Scald 1 1/4 cup of milk in a pot. Separate 1/4 cup and mix it with yeast until dissolved. Beat eggs, stir them in milk, along with yeast, salt and sugar. The mixture must be lukewarm, so if it cooled down, warm it up on very low heat constantly stirring.
2. Add flour and mix well until you get the batter/dough (I don’t really know how to call it in this case) of rather thick consistency, like thick sour cream. Cover the pot, and let the dough rise in a warm place. My yeast was not too good, and it took the dough 2.5 hours to rise. Usually it’s about 1 hour.

3. While the dough is rising, prepare garnishes (caviar and herring should be covered with plastic wrap and refrigerated) and lay the table. Blini are served hot, so later you will have no time for this. Leave boiling of eggs to the end though – it’s nice when they are served warm, just take then out of the fridge to acquire room temperature before boiling.
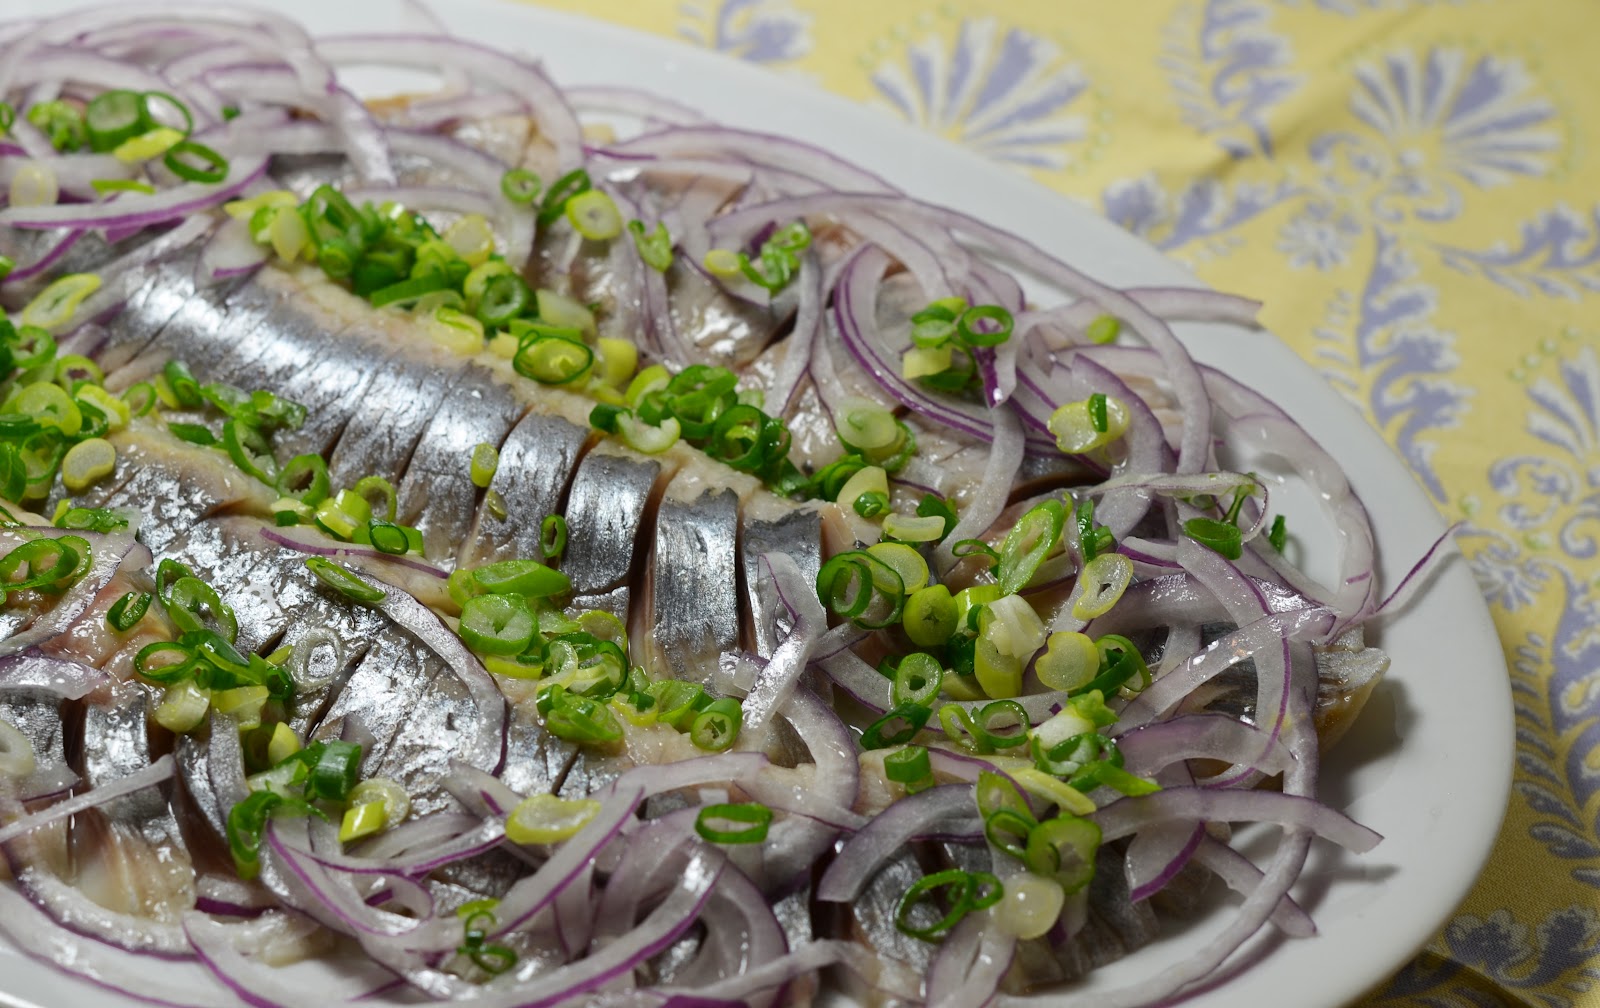 |
| Silvery herring is thinly sliced and decorated, drizzled with unrefined sunflower oil. |
4. When the dough rises and at least triples in size, scald the remaining milk, and mix it in the dough in small portions (about 1/2 cup each), stirring well every time. Small portions of hot milk will not kill the yeast, but will keep the mass very warm. After all milk is in, leave the dough to foam for about 30 minutes, covered. Don’t mix the foam!
 |
| It’s time to mix in milk. |
5. Prepare your baking tools. Pour some olive oil in a small bowl – for greasing your skillet. Make a greasing tool with a half of potato and a fork.
 |
| This greasing tool adds a hint of potato aroma to your blini. |
“Undress” half of a butter stick (it must be cold and firm) – for oiling ready blini. Arrange everything for easy handling.
 |
| My pancake “arsenal”. 🙂 |
5. Your dough/batter will look like a thick foam when ready to bake. Heat the skillet on high heat, grease it with the potato dipped in oil, scoop a ladle of dough on the skillet, and smear it around. The thick foam will not spread easily just by tilting and turning the skillet.
 |
| Almost ready to flip over! |
6. Bake on one side until bubbles form and the surface becomes matte, check if it’s nicely browned by lifting the edge a little, then flip over with the spatula and bake on the other side. Adjust the heat so your blini don’t burn, but bake through and are beautifully browned. Grease the skillet before each blin, otherwise your blini will not get a nice pattern.

7. Stack blini on a heat-proof dish, second side up (it is smoother and easier to oil), and gently oil each blin with the butter stick (don’t get carried away with this, put just a sheen of butter, you can add more later, while eating). Butter will prevent blini from sticking to one another.

8. When all blini are ready, loosely cover the dish with foil, and toss it into the 175 F oven to keep warm. At this point boil soft eggs.
Serve everything, all garnishes and more butter. 🙂 Each garnish, except butter that you can add to your liking, is used separately (i.e. I would not use herring with caviar OR caviar with eggs at the same time). My favorite is caviar, see how I do it.
 |
| Add some caviar, not much. |
 |
| Roll into a tube – very convenient to eat. 🙂 |
Another way is shown on the main picture, where a blin is folded in half, then in half again, and once more.
These blini are very filling and nutritious with all additions, so two per person is enough. I ate three, and it was pure shameless gluttony. 🙂 But, to tell you the truth, that’s what always happens when people eat blini – you just cannot get enough of them.
Notes:
Leftover blini, if any, should be refrigerated. Blini will stick all together, so don’t try to separate one blin – it will break. Warm them up all together in a microwave or an oven at 325 F, loosely covered with foil.
Interesting that my mom greased a skillet with a goose feather. It was a traditional old Russian way to do it, and she used clarified butter to grease.
In this post I used the term baking while technically blini are fried. It has a historical explanation since in old Russia almost all dishes were baked in the Russian oven. They baked breads, blini, and even made soups in pottery pots.

Leave a comment